Monday, December 20, 2010

Warm and Spicy Black Bean

I have been looking for some sort of warm bean dip recipe to make for quite some time. I've looked at all of my favorite recipe spots and through a few cookbooks, but nothing has really jumped out at me. It wasn't until I had some fresh sofrito in my refrigerator that made me think that it would be the perfect thing to start the recipe.

Looking for a quick and easy recipe to make for impromptu guests? This is definitely it! All ingredients can be kept on hand and it literally takes about 10 minutes to throw together. If you don't have any fresh sofrito, use the jarred type. No matter how this quick and easy dip is made, I guarantee it'll be a hit at the party!

Warm and Spicy Black Bean Dip

Warm and Spicy Black Bean Dip
Serves 3-4

1 (15 oz) can black beans, drained and rinsed
1 (3 oz) package cream cheese, room temperature
1/3 cup shredded sharp cheddar (plus more to top, if desired)
1 fresh jalapeno pepper, diced (optional)
1/4 tsp salt
1/2 tsp cumin
1/2 tsp chili powder
2 tbsp sofrito

Preheat oven to 375. In a large bowl, mash black beans with cream cheese, retaining some texture of the beans. Stir in remaining ingredients. Top with additional shredded cheese if desired. Spread into a greased baking dish and place into oven. Bake 20-25 minutes, until dip is bubbly. Serve with tortilla chips.

Sofrito

So I have been craving Mexican and Spanish food like nobody's business. Perhaps it's the coming of Cinco de May, although to be honest, it wasn't until I was writing this blog post that I realized it's only 2 days away!

I'm almost embarrassed to admit that this is the first time I made my own Sofrito. As you may or may not be aware, sofrito is the basis of many hispanic dishes. It's the perfect flavoring base for all sorts of dishes. The onion and garlic and cilantro add just the right flavor notes.

As I said, this was my first time making it, and as easy as it was, I can definitely guarantee this will be a repeat recipe. It literally took about 20 minutes, start to finish. It freezes perfectly, so I freeze it in 1/2 cup portions so that I always have it on hand when the craving for Spanish food strikes!

And be sure to check back later this week for more recipes utilizing this wonderful item.

Sofrito
Add caption


Sofrito
Yields 6 cups

12-16 cloves garlic, peeled
3 jalapenos, roughly chopped
2 green peppers, seeded and roughly chopped (about 2 cups)
1 red bell pepper, seeded and roughly chopped (about 1 cup)
2 medium onions, peeled and roughly chopped (about 2 cups)
4 plum tomatoes
1 bunch cilantro, washed and torn

In a food processor, pulse garlic and jalapenos until chopped. Add bell peppers and onions, and pulse. Add tomatoes and cilantro, and process until well combined. Store in the refrigerator for use within 3-5 days, or freeze in 1/2 cup portions for later use.

Buffalo Tempeh "Wings"

So I've got this fear of faux meats and all things tofu, tempeh, and seitan. I think it all stems from the first time I ever tried tofu. I was 16 and found a recipe for a seasoned tofu burger in a Cooking Light magazine. For some reason, I can remember the recipe taking me forever to make. I think there was pressing, marinating, cooking, frying, and probably a zillion other steps. (Actually, probably not, but you know how years have a tendency to exaggerate things) Anyway, I finally finished the recipe, sat down at the table, took a huge bite, and promptly spit it out. I absolutely hated it. The texture was completely different than I expected. And since I'm such a huge texture person, I was done. I swore off tofu for years.

Since I became a vegetarian, I still haven't really ever forgiven tofu. Sure, I have a few recipes that have tofu in them, but it's usually so well disguised that it's not discernable. I avoid the faux meats case in the grocery store, although my little vegetarian heart feels guilty for not giving it a try.

So today I did it. I recently purchased a great cookbook, Veganomicon, and have been reading all of the tempeh and seitan recipes. It got me thinking that maybe I was being just a bit harsh writing it all off over 1 bad experience. After a few days, I finally decided it was time to stop being a baby and give it the old college try. I found this recipe on the internet, made a few modifications, threw it in the oven, and crossed my fingers.

Let me tell you - delicious. No, seriously. They're delicious. Now I'm not getting crazy and saying meat eaters are going to eat this and instantly convert, but it's seriously tasty. The texture is different, but good different. The panko crumbs on the outside really give it a crunchy texture, and there's nothing a little wing sauce can't make tasty. Although the directions look lengthy, it really doesn't take more than 35-40 minutes to have these on the table. If you haven't tried tempeh, let this be your first recipe. And if you have, then you'd be crazy for not trying this recipe. Now it's your turn to give it the old college try.

*This recipe is dedicated to a longtime reader of 28 Cooks, LJ, who recently became a vegan. Enjoy, LJ!*

Buffalo Tempeh "Wings"

Buffalo Tempeh "Wings"
1 (8 oz) pkg tempeh
1/3 c soy milk
1/3 c flour
1/2 tsp salt
1 tsp thyme leaves
1 tsp paprika
1/2 tsp garlic powder
Freshly ground pepper to taste
1 cup Italian seasoninged panko crumbs

Wing Sauce
1/2 c Louisiana-style hot sauce
2 tbsp butter
1 tbsp ketchup

Bring 4 cups of water to boil over high heat. Meanwhile, remove tempeh from package. Slice into 8 strips. (If you are a first time tempheh eater and have texture issues, I recommend slicing into 10-12 strips) Once water is boiling, lower heat to medium high, add tempeh, and boil for 15 minutes. Drain and rinse with cool water.
Set out 3 bowls. In one, pour in soy milk. In the second, combine flour and seasonings. In third bowl, add panko crumbs. Preheat oven to 400 degrees.
Place each strip in milk. Coat in flour mixture, then briefly re-dip into milk. Toss with panko crumbs, coating well. Set on slightly oiled baking sheet. Repeat with remaining tempeh strips. Once all are coated and on baking sheet, lightly spray all "wings" with cooking spray. Place into oven and bake for 10 minutes. Flip "wings" over and bake for an additional 10 minutes.
While they are baking, place wing sauce ingredients in a medium sized bowl. Cover with Saran wrap and heat in microwave on medium high setting for a minute and a half. Remove from heat and whisk ingredients together.
When wings are finished baking, toss with sauce. Serve immediately.

Figs in Red Winea

Mele Cotte is hosting a food event that I just had to take part in. Cooking to Combat Cancer is a great event for foodies to get involved in promoting cancer awareness and to create recipes that include some of the cancer fighting foods and spices.

Although my family has not been immediately touched by cancer, I have quite a few friends who have been. One of my very best friends lost her mother to cancer, then her aunt a few short months later. It wasn't long before she was diagnosed with cancer as well. Thankfully, it was caught early enough and after a few rounds of chemo and radiation, she's been cancer free for the past few years. But how many haven't been that lucky??

That's why prevention and awareness is so important. According to the National Cancer Institute, nearly one-third of all cancer deaths may be diet related. That's crazy, isn't it?? The food we eat has a direct correlation to our health. Why wouldn't we want to eat as healthy as possible?? (As an aside, if you haven't yet read the book The China Study, I strongly suggest you do. It is an amazing research study about the relationship between diet and disease, and it's done in a very readable format. I highly recommend it!)

When I read the list of Cancer Fighting Foods and Spices on The Cancer Cure Foundation website, figs and red wine immediately jumped out. I have had a recipe for Figs in Red Wine scribbled down in my food notebook that I believe came from The Zuni Cafe Cookbook. Although I don't have the book and can't vouch for its content, I did like the idea of this recipe.

According to the list of foods, figs contain vitamins A and C, and calcium, magnesium and potassium, may curtail appetite and improve weight-loss efforts. They also contain a derivative of benzaldehyde, which investigators at the Institute of Physical and Chemical Research in Tokyo say is highly effective at shrinking tumors. Red wine has polyphenols that may protect against various types of cancer. Polyphenols are potent antioxidants, compounds that help neutralize disease-causing free radicals.

These figs are perfect by their own, but would be a fantastic addition to a cheese plate. A jar of these would also make a lovely gift to a fellow foodie.

Figs in Red Wine

Figs in Red Wine

1 1/2 c dry fruity red wine
2 bay leaves
10 peppercorns
1 strip orange zest
1 tsp honey
8 oz dried mission figs

In a small saucepan, bring red wine, bay leaves, and peppercorns to a boil. Lower heat and simmer uncovered, until wine is reduced to 1/2 cup. While wine is simmering, cut figs in half. Place in small jar with wine and add remaining ingredients. Cover, shake, and store in refrigerator.

Thai Curry Seafood Bruschetta

hen it first opened, and I absolutely did not like it. I think part of it was the fact that I was expecting more of a traditional bruschetta, and secondly, the dish was overcooked.

Obviously, it wasn't enough to keep me away, from either the dish or the establishment. I've ordered it since quite a few times, and it seems to get better and better.

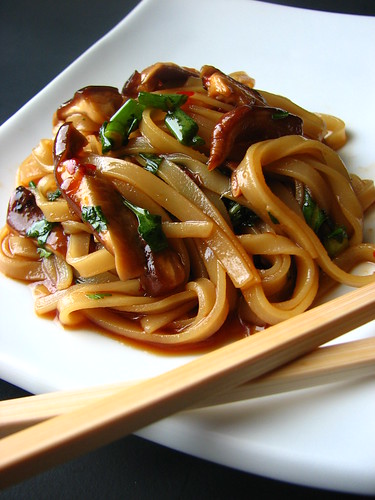
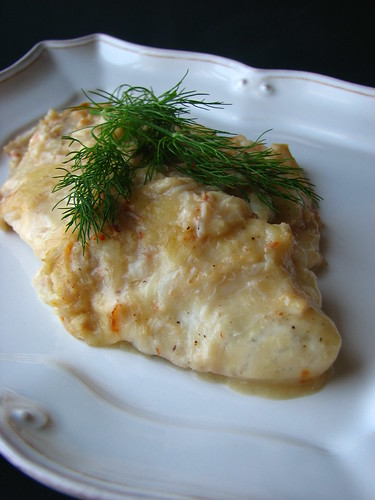
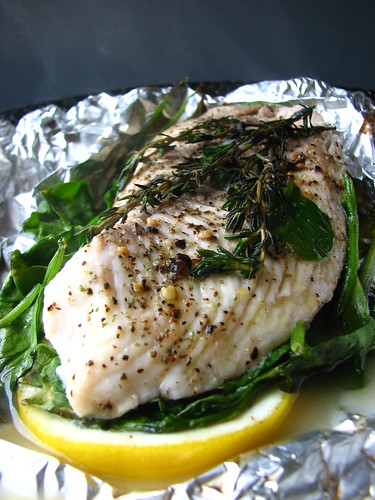
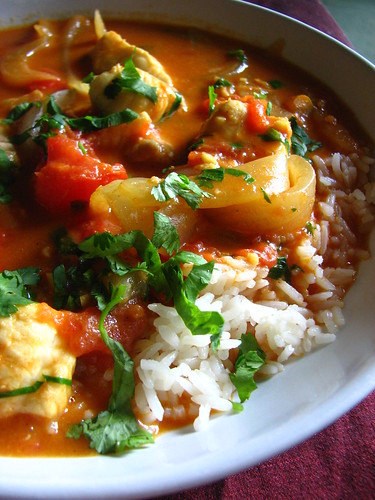
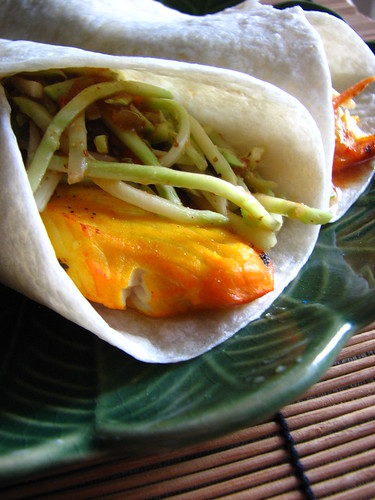
For this dish, I wanted to try and recreate the seafood mixture part, but kick up the flavor of the broth. This time, I've used a mixture of flounder, scallops, shrimp, and mussels, but you can easily mix and match any seafood you want. I added some coconut milk and red curry paste for a serious dose of taste. The fresh cilantro tossed in at the end adds just the right kick.

The best part of this dish?? It's one of those "Ace In the Hole" recipes. I've talked about this before, but every cook needs an arsenal of recipes that can be whipped up in the least amount of time possible, uses ingredients that are usually stocked in your kitchen, yet looks like you spent hours slaving over the stove. This recipe has some serious "Impress" factor, and is perfect to whip up when you are serving guests, or better yet, that special someone.

Thai Curry Seafood Bruschetta V

Thai Curry Seafood Bruschetta
Serves 4

2 tbsp olive oil
1 1/2 cups diced plum tomatoes
1 tbsp fresh ginger, minced
3 cloves garlic, minced
2 (15 oz) cans coconut milk
1 1/2 tbsp red curry paste
3 lb assorted seafood
1/4 c fresh cilantro, chopped
salt to taste

In large pot, heat olive oil over medium high heat. Add tomatoes, ginger, and garlic, and saute for 1 minute. Add coconut milk and curry paste, stir well, and bring to a boil. Add seafood and lower heat to a simmer. (It may be necessary to add seafood in stages, judging by how fast it cooks - please see chart at the end) Simmer until seafood is done. Add cilantro, stir well, and served with crusty bread.

The following are guidelines on roughly how long my seafood took to cook:

5-7 minutes
Large clams
Large scallops
Large shrimp

3-5 minutes
Fish (flounder, tilapia, etc), cut into 1-2" pieces
Smaller shrimp
Bay scallops
Mussels

Monday, December 13, 2010

Mexican Crackers

So unbeknownst to you, I spent the last 2 weeks eating only raw foods, mostly fruits and vegetables. I like to do this at least twice a year, just giving my body a chance to rest from the indulgence of the holiday season and focus on whole foods. It's amazing how much better I feel when doing it, and to be honest, it flies by and I'm usually sad to see it end.

In the midst of my 2 week "Rawness," I also purchased a new dehydrator. I had been reading some raw foodie blogs and was intrigued by the raw eating lifestyle, which makes significant use of a dehydrator. According to some of what I've read, it's considered raw if it's not heated above 114 degrees. Essentially, you can warm and dry it while still retaining the desirable enzymes.

One of the toughest things for me during "Raw Time" is not having anything crunchy. Although carrots sprinkled with a little kosher salt are pretty darn satisfying, I sometimes just crave the crunch of a chip or a cracker. The recipe for these crackers turned up while reading some of the forums, so I made some adjustments and created these spicy and tasty crackers. I made them in the dehydrator and cooked them at 105 degrees, but I'm sure you could easily bake these in your oven at a very low temperature. Go ahead and give these a try for something different.

Mexican Crackers

Mexican Crackers

1 cup raw sunflower seeds
1 cup raw almonds
1/2 cup flax seeds
1/2 cup raw cashews
3 plum tomatoes, seeded and chopped
1 red bell pepper, diced
1 tsp cumin
2 1/2 tsp salt (I used Adobo)
1 tbsp taco seasoning mix
1 tsp onion powder
1 tsp garlic powder
1/4 tsp cayenne pepper

In a coffee grinder or food processor, process all seeds and nuts until they are ground into flour. In a larger food processor, combine all seeds and remaining ingredients and process until well mixed and smooth. Spread onto teflex or parchment paper thinly, and place into food dehydrator. Dry for a few hours until dry on top, then flip, remove teflex/parchment, and allow to dry until crispy. (This took another 12 hours). Store in well-sealed plastic container or bag.

Asian Snack Mix

So the holidays have finally come and gone. Mine were quite enjoyable and actually very relaxing this year. I got to spend time with friends, family, and loved ones, which is really what the holidays are all about.

I rung in the New Year in a very relaxed and quiet way. Some friends of mine had a little get-together and we enjoyed some lovely Vietnamese spring rolls and soup. I brought some edamame to enjoy, but I also wanted to make something to snack on in-between courses. I searched online for Asian snack mix recipes, but couldn't find quite what I wanted, which led me to creating my own.

This is quite an easy recipe to make, and the bulk of the time is spent just baking in the oven. You can kick up the spice as much as you want - the recipe below hits about a 2.5 out of 5 on the hot scale, so feel free to adjust the chili-garlic sauce and cayenne pepper to your own tastes. Also, feel free to change the cereals and other snack ingredients to suit your own tastes.

Happy New Year, ya'll!

Asian Snack Mix

Asian Snack Mix

2 c corn Chex cereal
2 c wheat Chex cereal
2 c mini-pretzels
1 c wasabi peas
1 c Cheez-it crackers (or Goldfish crackers)
1 c Chow-mein noodles
6 tbsp butter, melted
2 1/2 tbsp ginger stir-fry sauce (I used a Kikkoman brand)
2 1/2 tsp chili powder
2 tsp cumin
1/2 tsp salt (I used Adobo)
1 tsp sesame oil
2 tsp chili-garlic sauce
1/4 tsp cayenne pepper

Preheat oven to 250 degrees. In a large baking pan, combine cereals, pretzels, peas, crackers, and noodles. In a small bowl, whisk together melted butter and remaining ingredients. Pour over snack mixture and stir well, coating pieces evenly. Place into preheated oven and bake 30-45 minutes, stirring every 10-15 minutes or so, until pieces are crisp. Remove from oven and cool.

Cheezy Kale Chips

Snack foods are my absolute demise when it comes to trying to eat healthy. I can easily pass up cakes, cookies, pies, and other sweets, but my resistance is low if you dangle any kind of salty snack in front of me.

Whenever I'm trying to really at healthy, I usually fire up the dehydrator (or Dry Baby, as I like to call it) to make some healthy snacks to have on hand. To be honest, my dehydrator is probably used more for snacks than anything else!

This week, I dried some lovely apple slices tossed in apple pie spice, some lovely fresh kiwi fruit, and these cheezy kale chips. The last kale chips were such a hit, but the Dry Baby really makes them even better. Any recipe of kale chip, when made in the dehydrator, will last for days, so it's perfect to make a large batch and snack on them throughout the week. When I'm feeling lazy, I will just toss some fresh kale leaves with a smidgen of olive oil and whatever seasoning salt happens to be on hand - lemon pepper being my favorite at the moment. If I have a few more minutes, I'll make this recipe.

Cheezy Kale Chips

Cheezy Kale Chips

2 large bunchs of kale, washed, destemmed, and torn into pieces
1 cup raw cashews, soaked in water for 2 hours
1 red bell pepper, seeded and chopped
juice of 1 lemon
1 tbsp nutritional yeast
2 tsp agave nectar
1/2 tsp salt
1/2 tsp garlic powder
1/2 tsp cumin
1/2 tsp chili powder

Drain cashews. In a food processsor, combine cashews and remaining ingredients, except for the kale leaves. Process until well combined. In a large bowl, toss kale leaves with cashew mixture, and mix well with your hands, until every piece is coated.
Place in dehydrator and dry at 115 degrees for 6-8 hours, until crispy and coating is dry. Store in a airtight container.

Pineapple Curry Hummus

I don't know where it comes from. But sometimes, random combinations of flavors will pop into my head and I'll write them down for later. In my hummus file, I've had "pineapple" and "curry" written down for a long time, but I've been scared to try it. Theoretically, I thought it could possibly work, but I was still scared. Today I conquered that fear. Even walking through the grocery store this morning, picking up ingredients, I was still very apprehensive about how it would all work out together.

Amazingly enough, it's very tasty. The sweetness of the pineapple is just perfect to offset the full-on flavor of the curry powder. It actually reminds me of an Indian dish I've had in the past. This is definitely one hummus recipe you'll have to try to taste how the flavors work together.

Pineapple Curry Hummus

Pineapple Curry Hummus

1 (15.9 oz) can garbanzo beans, rinsed and drained
1/4 c olive oil
2 tbsp lemon juice
1 tbsp tahini
1 scant tsp curry powder
1/3 c crushed pineapple
salt to taste

Combine beans, oil, lemon juice, tahini, and curry powder in food processor. Process until well blended. Remove, place in medium sized bowl, and stir in pineapple. Chill in the refrigerator for an hour or so for flavors to make friends.

Cilantro Zucchini Hummus

I love to talk food. I will talk about it anytime with anyone. And it's usually a great inspiration for recipe creation. This recipe came from a conversation I had with Theresa, an old friend of mine yesterday afternoon. We were discussing the vegetarian, vegan, and raw diets. Both of us have a desire to try a raw diet so we were talking about ways to incorporate more raw food into our daily diets. We then started taking about some healthy treats to make and of course the conversation turned to hummus.

It was only natural that my mind immediately went to trying to make a raw hummus. I was on my way to the grocery store, mentally kicking around a few ideas. It wasn't until I passed a table on someone's driveway with a huge table of zucchini that said "Free - Please take it all!" that made me think of using this often over-abundant vegetable.

This recipe is fantastic. I absolutely love it. It's fresh-tasting and is simply fantastic. Serve with fresh vegetables or pita chips. You could also use it as a sauce or a dressing by decreasing the amount of zucchini to 4 cups, as shown here. Or add some fresh jalapeno for a nice little kick! And the best part is that it only takes a few moments to chop everything up and throw it in the blender or food processor. So go ahead - give it a try.

Cilantro Zucchini Hummus

Cilantro Zucchini Hummus

6 cups zucchini, peeled and chopped
1/4 c tahini
1/4 c fresh lemon juice
1/4 c fresh lime juice
1/4 c olive oil
3 cloves garlic, chopped
1 tsp salt
3/4 tsp cumin
3/4 tsp smoked paprika
1/4 c fresh cilantro, chopped

Add all ingredients, except cilantro, into a blender or food processor. Process until creamy and smooth. Stir in cilantro. Serve and enjoy!

Cucumber Dill Hummus

Taking your Requests

Wow - it's been awhile, hasn't it?? I've neglected this for a few weeks, but it sure feels good to be back. And what better way to get back into it than with one of my favorite things to experiment with - HUMMUS!

One thing I love about this blog is that I often get emails from readers, challenging me to take one of their recipes and change it, or they give me awesome suggestions and ask me to come up with a recipe. This recipe is one of the latter, and was suggested by a hummus lover who wanted a Cucumber Dill Hummus. The idea immediately jumped out of the email to me and I knew I had to do it.

As always, this hummus is super easy to make. I think I threw it together in about 15 minutes, and it's a super healthy snack to have on hand. The cucumber and dill fit perfectly, and I think it would be even better topped off with some feta cheese.

On a side note, I have gone through an appliance gathering spree, and have obtained a new food processor, food dehydrator, and blender. I've been experimenting the most with the dehydrator, so don't be surprised if you see some recipes pop up on here for that. And as always, continue to send in your suggestions and ideas. I love to hear from my readers, even when I'm not posting as often as I should. But I promise to have some new recipes for you again next week and get back to my regularly scheduled postings!

Cucumber Dill Hummus

Cucumber Dill Hummus

1 (15 oz) can garbanzo beans, rinsed and drained
2 tbsp freshly squeezed lemon juice
1 tbsp tahini
1/2 tsp salt
1 clove garlic, minced
up to 1/3 cup olive oil*
1 c cucumber, peeled and diced
1 heaping tbsp fresh dill, minced

In a food processor, add garbanzos, lemon juice, tahini, salt, and garlic. Turn processor on and slowly drizzle in olive oil, until it's creamy enough. (*I typically use between 1/4 and 1/3 cup) Add in cucumber and dill, and pulse a few times until well combined but not fully incorporated. Allow to chill in the refrigerator for an hour or so until the flavors get all friendly-like. Enjoy!

Field Greens with Warm Mushroom Rosemary Dressing

I've been craving mushrooms something fierce these past few days. At the same time, I'm at the point where I am getting a little sick of eating salad with the same dressings every day for lunch. So I thought I'd kill two birds with one stone and do a warm mushroom dressing.

This is a great little dressing and takes about 10 minutes to make from start to finish, which is a bonus! It would also be a great sauce to go over rice or pasta, or thrown on top of fish, steak, or even a baked potato. But it's simply wonderful as a salad dressing and it packs easily for work. Simply place mushrooms and dressing in a small container, heat up in the microwave, and toss over a separate container of salad greens. It couldn't get any easier!

Field Greens with Warm Mushroom Rosemary Dressing

Warm Mushroom Rosemary Dressing
3 tbsp olive oil
1 clove garlic, minced
4 cups thickly-sliced baby bella mushrooms
Salt/pepper to taste
1 tbsp fresh rosemary, minced
2 tbsp red wine vinegar

In a medium saucepan, heat olive oil over medium heat. Add garlic and saute for 30 seconds. Add mushrooms, season with salt and pepper, cover and saute for 6-7 minutes, stirring occasionally until tender. Add rosemary and vinegar and simmer for 1 to 2 additional minutes. Remove from heat and toss over fresh field greens.

Just Because It's Vegan: Thai Curry Tempeh Salad

This is another installment in the "Just because it's Vegan" series. These are vegan dishes that are tasty and delicious enough to wow any eater.

I love red curry paste. As of right now, I just counted 6 small cans of it in my pantry. I wanted to make some sort of salad to throw in wraps and pitas for lunch this week and thought some sort of thai curry mayo would be a great base. This is a great recipe that's perfect for weekday lunches. The bold flavors of the curry paste, combined with the fresh cilantro, makes a lovely flavor base for the tempeh. If you haven't had tempeh before, I think this would be a great introduction. High in protein, low in fat, it's meaty enough to fill you up. It also has plenty of variations. Don't do tempeh? Substitute tofu. Want some meat? Substitute tuna, chicken breast, or shrimp. Want a lower fat salad? Substitute yogurt for the mayo. This recipe is open to almost any suggestion.

Give this salad a try. With only 6 ingredients, I think you'll be pleasantly surprised at how simple yet tasty this is.

Thai Curry Tempeh Salad

Thai Curry Tempeh Salad

2 pkgs (8 oz each) soy tempeh
1 c vegan mayonnaise
1 tbsp red curry paste
1/2 c diced red bell pepper
1/2 c diced green onions
1/4 c fresh cilantro, minced

In a large saucepan, bring 4 cups water to boil. Break tempeh into large pieces and add to boiling water. Boil for 15 minutes. Drain in colander and rinse with cold water. Cool tempeh. Line colander with 2 layers of paper towels. Crumble tempeh into small pieces. Cover with 2 more pieces of paper towels and press out as much water as possible.
In a large bowl, whisk together mayo and red curry paste. Stir in remaining ingredients, including tempeh, and mix well. Chill in the refrigerator for an hour. Serve in a wrap, pita, or eat with tortilla chips.

Thai Shiitake Mushroom Salad

Summer has officially arrived in the Northeast. We're expecting temperarures to reach the high 90's which is exactly what I love. But with summer comes a desire to cook less and keep the kitchen as cool as possible.

So that's when I start trying to find recipes that require no heat whatsoever. Enter this noodle salad. It's quick and easy to prepare and would be perfect as a main dish. It would also be a fantastic addition to a picnic or potluck. It can also easily be veganized by omitting the oyster sauce and using agave nectar in place of honey.

The shiitakes marinate while you are chopping and preparing the rest of the ingredients, and then it's just a matter of throwing it all together.

If you're looking for a unique way to serve this, use glass noodles in place of the thicker rice noodles and wrap up in spring roll wrappers for a quick appetizer that needs no extra sauce.

Thai Shiitake Mushroom Salad II

Thai Shiitake Mushroom Salad
Serves 3-4

1/2 c soy sauce
1/4 c honey
1/4 c mirin
1 or 2 tsp chili garlic sauce
1/2 tsp ginger
1 tsp oyster sauce
1/2 tsp sesame oil
6 oz shiitake mushrooms
6 oz rice noodles
2 tbsp fresh basil, minced
2 tbsp fresh cilantro, minced
1 tbsp fresh mint, minced
1/2 c green onion, chopped

Whisk soy sauce, honey, mirin, chili garlic, ginger, oyster sauce, and sesame oil in a small bowl. Slice mushrooms into strips and place in marinade. Set aside and marinate for at least 30 minutes. Prepare rice noodles according to directions. Combine basil, cilantro, mint, and onion in a large bowl. Add mushrooms and marinade, as well as noodles. Stir and serve.

Cucumber Salad

Sometimes less is more when it comes to food. Although I tend to gravitate towards recipes with multiple steps and various ingredients, there comes a time when you just want something simple, easy, and quick.

I almost hesitate to call this a salad, since it really is just a few ingredients. But despite the sparse ingredient list, this is a recipe that is big on flavor. It's also perfect for those last minute "I need something to go with this dish QUICKLY" situations too. And it's super-easy preparation lends itself to a myriad of variations. Switch the fresh herbs around or use Champagne vinegar instead of the rice wine vinegar. But no matter how you make it, you'll have this on the table in 5 minutes or so.

Cucumber Salad II

Cucumber Salad
Serves 3-4

2 seedless cucumbers, peeled and julienned
2 tbsp rice wine vinegar
1 tbsp extra virgin olive oil
1 tbsp fresh thyme leaves, minced
1/8 tsp coarse kosher salt
Fresh pepper to taste

Place all ingredients in a medium bowl. Stir well with a large spoon and serve. (Does it get any easier??)

Brown Rice Salad with Orange Chipotle Vinaigrette

Well, it's official - I'm snowed in for the weekend. I'm not sure of the exact measurement of how much we got (and it's still snowing) but it's somewhere between over the knee and under the waist. That's a pretty scientific measurement, right?

There's nothing like having all day to be in the house, and it's given me a great opportunity to monkey around in the kitchen. I've got a huge stack of cookbooks next to me and a note pad absolutely covered with ideas, so today should be quite the productive day - foodwise, that is.

I've recently fallen back in love with brown rice. I picked up a gorgeous bag of some organic brown rice and wanted a fun, yet different way to use it, so rice salad it is.

This is a delicious salad. The dressing has just the right mixture of sweet and spicy, and combined with the heartiness of the rice and black beans, you have a salad that could easily stand on its own as the main event. This is also a great make ahead dish, so this is definitely one you may want to file away for future use when guests are coming over.

Brown Rice Salad with Orange Chipotle Vinaigrette

Brown Rice Salad with Orange Chipotle Vinaigrette
Serves 4-6

Vinaigrette
4 cups fresh orange juice
2 tsp pureed chipotle peppers in adobo sauce (or more, should you really want to kick it up!)
1/2 tsp cumin
2 tsp agave nectar (or honey)

Salad
4 cups cooked and chilled brown rice
1 (15 oz) can black beans, drained and rinsed
1/2 c diced red onion
1/4 c chopped fresh cilantro

In a medium saucepan, boil orange juice until reduced to 2/3 cup. (This takes about 25-30 minutes). Remove from heat and set aside to cool. In a small food processor, blend reduced orange juice, chipotle peppers, cumin, and agave until well combined.
In a large bowl, combine rice, beans, onion, and cilantro. Pour vinaigrette over salad and toss until well combined. Serve and enjoy!

Tilapia with Parmesan Crab Sauce

I think one of the best parts of cooking is being able to feed other people. I love to entertain and have people enjoy my cooking. Every home cook wants to be able to wow their guests and have everyone talking about their food for a long time. You want people to beg for the recipes. And best of all, you want to be able to say, "Oh, this old recipe?? I just threw it together."

Every home chef needs a few good "ace-in-the-hole" recipes - you know, the ones you can throw together, yet they look like you were slaving in the kitchen for hours. This recipe is absolutely perfect. It looks gourmet, yet you can truly have this on the table in about a half an hour. The ingredients are simple and are probably found in any well stocked refrigerator and pantry.

I adore this recipe. It's perfect for serving to guests or for a nice quiet romantic dinner. Go ahead - give it a try. And then sit back and wait for the compliments to come.

Tilapia with Parmesan Crab Sauce

Tilapia with Parmesan Crab Sauce
Serves 4

4 tilapia filets
1 tbsp butter
2 tbsp flour
A scant 1/8 tsp nutmeg
2 tbsp soy milk
1/2 tsp worcestershire sauce
1/8 c dry white wine
3/4 c Parmesan cheese, shredded
8 oz fresh crab meat (I use claw)

Preheat oven to 400 degrees. In a small saucepan over medium high heat, melt butter. Whisk in flour and nutmeg. Slowly whisk in milk. Continue whisking and cook until smooth. Add in worcestershire, white wine, and Parmesan cheese. Add crab, mix well, and remove from heat. Season tilapia filets with salt and pepper. Place in well oiled baking dish. Pour sauce over tilapia. Bake in oven for 20-25 minutes. Serve and enjoy!

Lemon Thyme Tilapia Packets

If you're a long-time reader of 28 Cooks, you know that I favor recipes that are simple and quick to make, yet look like you invested a few hours in the kitchen. I also try and eat as healthy as possible, so I like to find recipes that not only fulfill the above qualities, but are also nutritious and filling.

Tilapia is a recurring ingredient on 28 Cooks because not only is it delicious and nutritious, but it's so easy to prepare. I wanted something quick to throw together for dinner tonight, so I knew tilapia was the perfect choice.

These packets literally take 5 minutes to throw together. The most time consuming task is slicing the lemons. Seriously. And the best thing about this recipe is that you can literally take it in a hundred directions. Use salmon or halibut in place of the tilapia. Try another herb instead of the thyme. Use lime instead of lemon. Throw some snowpeas down instead of the spinach. Use a flavored olive oil. No matter how you make it, this is a delicious dish that's sure to be a favorite!

Lemon Thyme Tilapia Packets

Lemon Thyme Tilapia Packets
Serves 2

2 tilapia filets
Salt and pepper
A touch of olive oil
1 organic lemon
2 large handfuls of spinach leaves, washed
A few sprigs of fresh thyme

Preheat oven to 425. Lightly spray 2 large sheets of foil or parchment paper with cooking spray. Slice lemon into 8 slices and discard the 2 end pieces. Place 3 slices of lemon horizontally in the center of the foil. Place handful of spinach on top of lemon. Place seasoned tilapia filets on top of spinach, drizzle with a little olive oil, and place thyme sprigs on top of fish. Fold up packets and place in preheated oven on baking sheet. Bake for 20 minutes and remove from oven. Allow to rest for a few minutes before opening packet. Discard lemon slices and thyme sprigs, serve, and enjoy!

Horseradish-Crusted Salmon

I don't think it's any big secret that I love fish, especially tilapia. But I thought it was high time I made a recipe with something other than tilapia!

Salmon is such a great-tasting fish. It's very versatile and is super easy to prepare. If you're looking for a great-tasting yet easy and quick to make salmon recipe, here you go. The topping takes about 5 minutes to whip up, and then 15 minutes to cook. That means you can have this on the table in about 20 minutes, if my math is correct. So go ahead, give this tasty recipe a try!

Horseradish Salmon III

Horseradish-Crusted Salmon
Serves 4

2 (6 oz ea) salmon filets
2 tbsp horseradish
1/2 c italian seasoned bread crumbs
1 tsp fresh lemon zest
1 tbsp stone-ground mustard
2 cloves garlic, minced

Preheat broiler. Combine horseradish, bread crumbs, lemon zest, mustard, and garlic in a small bowl. Season salmon with salt and pepper and place in lightly-oiled baking dish. Firmly pat horseradish mixture on top of both filets. Place under broiler. Cook about 12-15 minutes, until topping is nicely browned and salmon is done. Serve and enjoy!

Tilapia Poached in a Chipotle Mushroom Broth

Listen, I like gourmet foods. I really do. I love eating at fancy restaurants, I love truffles, I love anything foodie. But the thing is, that's about 8% of what I cook at home on a regular basis.

Money is tight for everyone these days. Everyone's talking about budgets and cutting back and doing without some of those luxuries we once indulged in. Even I am looking at ways on cutting back, especially moving from an apartment with a roommate, splitting expenses, to my own abode.

That's why I love this recipe. It's fancy enough to serve to guests, yet cheap enough that you can serve it without feeling guilty about blowing your food budget. This recipe serves 4 and cost less than $10!

And not only is it cost effective, but it's also dead-easy to make. I love poached fish recipes, because they really are almost foolproof! Since the fish is simmering in a flavorful broth, you'd really have to almost go completely out of your way to overcook it. The 2 chipotles give it a bit of a kick, so if you're sensitive to spicy foods, I'd use 1/2 to 1 pepper. Now go ahead and give this simple recipe a try - you'll have dinner on the table in less than 30 minutes!

Tilapia poached in Chipotle Mushroom Broth

Tilapia Poached in a Chipotle Mushroom Broth
Serves 4

Broth
2 chipotle peppers (I used the canned ones in adobo sauce)
1/4 c heavy cream
2 cups vegetable stock
1 clove garlic, minced
1/2 tsp cumin
1/2 tsp onion powder

4 tilapia fillets
A bit of flour, salt, and pepper
2 cups sliced mushrooms
1/4 c fresh cilantro, minced

In food processor, process chipotle peppers and heavy cream until well combined. Add stock, garlic, cumin, and onion powder, and pulse until mixed. Meanwhile, lightly coat tilapia fillets with flour, seasoned with salt and pepper. Set aside.
In large flat skillet, heat a few tbsp of oil over medium heat. Add mushrooms and saute for 2 minutes. Push mushrooms to the side of the pan and add fillets. Allow to
brown for a minute on each side. Then pour broth over mushrooms and fish and cover pan. Allow to simmer 8-10 minutes, until fish is tender and cooked. Sprinkle fresh cilantro over dish and serve immediately. This would be excellent over rice so not a drop of the broth is wasted.

Balti Fish Curry

Longtime readers of this blog will tell you that Mexican and Indian are definitely 2 of my very favorite foods. I am confident that I could live a happy life eating anything from either of these 2 wonderful cuisines.

My local Wegmans was having a sale on catfish this past weekend. Although I usually gravitate towards tilapia or salmon in the Seafood department, the price was almost too good to pass up. I grabbed a few filets without really thinking through what I wanted to do.

I recently checked a book, 660 Curries, out of my local library. I must admit that I have yet to crack the cover, but the idea of some sort of curried fish immediately sprang into my mind. I started pulling out things I thought would be lovely in curry - fresh ginger, garlic, onion, crushed tomatoes, and cilantro. I also found a lone can of coconut milk and added that to the pile.

Out of that pile, this recipe was born. It's easy and relatively quick. You could literally have this recipe on the table in about 30 minutes. And again, you're looking at another budget recipe, especially if most of this is already in your pantry. I guarantee this is a curry recipe you won't want to miss. And be sure to check out some of the other curry recipes in the main dish section.

Balti Fish Curry

Balti Fish Curry
Serves 4-6

1 pound catfish (or other firm-fleshed fish)
3 tbsp vegetable oil
3 cups vidalia onion, thinly sliced
3 cloves garlic, minced
1 tbsp fresh ginger, minced
1 serrano pepper, chopped (optional)
1 1/2 tsp curry powder
1 tsp paprika
1 tsp cumin
1 tsp salt
1 (28 oz) can crushed tomatoes in thick puree
1 (15 oz) can coconut milk
1/4 c fresh cilantro, chopped

Cut fish into 2" pieces. Set aside. In large pot, heat oil over medium high heat. Add onion, garlic, and ginger, and saute for 2 minutes. Add serrano pepper, curry powder, paprika, cumin, and salt. Stir and saute for another 2 minutes. Add contents of tomato can and stir well. Increase heat and bring to a boil. Lower heat, leave uncovered, and simmer for 10-15 minutes, until slightly thickened. Add coconut milk, stir well, increase heat, and bring back to a boil. Add fish and stir. Reduce heat to a simmer and cook for another 5-10 minutes, until fish is cooked through. Remove from heat and stir in cilantro. Serve over basmati rice and enjoy!

West Indies Salmon Cakes

My mother was, and still is, a fantastic cook. One of my favorite meals as a child that she would make were her salmon cakes. It was definitely an odd choice to have as a favorite kid's meal, but we always loved when she made them.

I was thinking about making something different, yet relatively simple, when her salmon cakes came to mind. I immediately jotted down a list of what I "thought" may be good in them and headed off to the store.

I got to the canned meat section, which can be a little scary to a vegetarian, and noticed the salmon shelf. There were a few different kinds at a few different price points. I instinctively knew the bottom tier probably wasn't what I wanted, and I grabbed 2 cans of a Wild Alaskan salmon. The label was so pretty and gourmet-looking, I just knew I couldn't be wrong.

Well, I got home and started pulling out what I needed for the recipe. I grabbed the can opener and just as I was about to open the can, I thought, "Huh - I guess I just open this like a can of tuna and go from there." I gave another quick look to the label when I read the phrase "contains skin and bones." What?!??! Why would the can contain skin and bones? I popped those bad boys open, and sure enough, there was plenty of skin and plenty of bones. I'm not lying - had I not already had the wheels in motion, I would have tossed those two cans and just gotten the cans where it's already deboned and skinned. Instead, I spent about 30 minutes, picking out the bones and skin and salvaging as much meat as I could.

All that to say, do yourself a favor and buy the other stuff - you know, the stuff that doesn't look like they just hacked up a fish and shoved it into a can. You'll thank me later. (as an aside, I just spoke with the Mama herself, and she says that she always got the skin and bone kind and just picked around the bone bits)

That aside, these cakes are very tasty. There's not much too them, yet they really deliver the flavors. They also freeze exceptionally well uncooked, so this is something you can make ahead of time and keep on hand in the freezer. They're lovely served with tartar sauce, or I made an easy cilantro aioli by tossing some minced cilantro in some mayo.

This recipe is also a very cheap option for a filling main dish. Total cost of ingredients was under $10.

West Indies Salmon Cakes

West Indies Salmon Cakes
Makes 6

2 cups flaked salmon
2 cloves garlic, minced
1/3 c onion, minced
1/2 c flour
2 tsp baking powder
1 large egg, whisked
1 tsp curry powder
1/2 tsp cumin
1/2 tsp salt
Pepper to taste
1/2 tsp crushed red pepper

Combine all ingredients in a large bowl and mix until well combined. With hands, form 6 patties and set aside. In a frying pan, pour a tbsp or two of oil. Heat over medium high heat. Fry patties for 2-3 minutes each side until done. If freezing, place between layers of wax/parchment paper in freezer bags and freeze. Thaw and cook as above.

Fish Gyros with Cucumber Tzatziki Sauce

So every once in awhile, I create a recipe that immediately shoots to the top of my "Absolute Favorites" list. Usually, it's something I throw together without much thought, and then ends up completely astounding me with its deliciousness.

This recipe is absolutely fantastic and was the result of a long love affair with gyros. I can still remember the first one I ever had - I was about 11 or 12, and we were still living in Nairobi, Kenya. A new Greek stand went into the mall that had just been built down the street (the first in the country, ya'll) and we just had to try it. Their gyros had about 4 different sauces on them and were OUTSTANDING. They also made a falafel that was pretty close to heaven. But when I gave up meat, I sadly said goodbye to the goodness of the gyro. It wasn't until my mother, who is also a vegaquarian, convinced our local spot to make a gryo with grilled mushrooms, onions, and peppers that the hope came alive again.

I was on my way to the grocery store and was kicking over some ideas in my head when it hit me - a fish gyro. I wanted to make it a little more healthy and less carb-y, so I wrapped it all in a nice large Boston lettuce leaf. Whoa. First of all, the tzatziki sauce is fantastic. If you make nothing else, make the sauce. It's perfect on the fish, but it would make a fantastic salad topping or dip for fresh vegetables. Now pair it with the seasoned fish, and you have yourself a wonderful meal. I mean, look at it....

Fish Gyros with Tzatziki Sauce

Fish Gyros with Cucumber Tzatziki Sauce

Tzatziki Sauce
8 oz plain yogurt
1/3 c diced cucumber
1 clove garlic, minced
1/4 tsp crushed red pepper
1/4 tsp salt
pinch sugar
1/4 c fresh cilantro, minced

1 pound tilapia filets
Salt, pepper, Italian seasoning, and ground coriander

Combine all ingredients for the sauce in a small bowl, and allow to chill in the fridge for an hour or so. Season fish filets with spices and cook by preferred method. (I threw mine in the oven at 375 degrees for about 10-12 minutes).
Serve fish with diced fresh tomatoes and onions, topped with tzatziki sauce, and wrap in a large washed leaf of Boston lettuce. Enjoy!

Baja Fish Tacos

Seriously, without a doubt, this is my favorite thing to order at a Mexican restaurant. I must admit, that up until about 3 years ago, I was extremely skeptical about the tastiness of a fish taco. But a trip back to California and a few fish tacos later, and I'm a convert.

However, I unfortunately (or fortunately, some would say) stumbled on the nutritional data at one of my fish taco haunts. Whoa. Seriously. After reading this, and the data on other similar dishes, I just couldn't order them without feeling the guilt of eating my caloric allotment for the day.

So here's my stripped down and healthier version. It still has the delicious flavors and spiciness, yet doesn't bring the heavy and greasiness of fried fish. And like most of my recipes, you can switch it up to use your favorite fish, add pico de gallo, cheese, or whatever else you like on your taco. And the coleslaw is so fantastic, I think you'll enjoy it on its own. So go ahead, try these guilt-free tacos today! If you're heat sensitive, I'd use 1/2 chipotle pepper.

Baja Fish Tacos

Baja Fish Tacos

Chipotle Cole Slaw
4 tbsp fresh lime juice
2 tbsp dijon mustard
1 chipotle pepper in adobo, pureed in 1 tsp sauce
1 clove garlic, minced
1 tbsp olive oil
1 tbsp honey
Pepper to taste
2 c coleslaw mix
2 tbsp fresh cilantro, minced

Fish
1 pound flounder, tilapia, or cod fillets
2 tbsp lime juice
2 tbsp olive oil
1/2 tsp of a Sazon packet

In a food processor, combine lime juice, mustard, chipotle pepper, garlic, oil, honey, and pepper until well combined. Pour over coleslaw mixture, stirring in cilantro. Put into a ziploc bag, and allow it to marinate in the fridge for a few hours or overnight.
In a small bowl, whisk together lime juice, oil, and Sazon. Pour over fish in a ziploc bag, and marinate in fridge for an hour or so. Remove and drain from marinade. Prepare fish on the grill, under the broiler, or sauteed in a smidge of oil until done. Serve on flour tortillas with a serving of coleslaw. Enjoy!

Friday, December 10, 2010

Lemon Custard Tart with a Gingersnap Crust

Lemon Custard Tart with a Gingersnap Crust

So I had some leftover gingersnap cookies from something or other, and have been snacking on them over the past few days. Every single time I took a bite out of one, I got this intense urge to pair it with something lemony and fresh. And so this tart was born.

Sure, she ain't the prettiest girl at the ball (especially since I had the oven rack just a bit too close to the heat) but she definitely knows how to strut her stuff. The custard is almost lemon meringue-y, with a nice tart flavor that sits nicely on a bed of gingersnaps. And since it's such a snap to make, this is definitely one of those desserts you know you can serve to guests at a moment's notice.

Lemon Custard Tart with a Gingerbread Crust

Lemon Custard Tart with a Gingersnap Crust

2 cups gingersnap crumbs (this was about half a package of cookies for me)
4 tbsp butter, melted
1 tbsp fresh lemon zest
2/3 cup sugar
2 large eggs
4 tbsp butter, melted
2 tbsp sour cream
1/4 c fresh lemon juice
3 tbsp fresh orange juice

Preheat oven to 350. Combine gingersnap crumbs and melted butter. Press into a well-greased tart pan, or individual tart molds. Press as thinly as possible. Bake in oven for 5-7 minutes until set.
Meanwhile, combine zest and sugar in food processor and process until combined well. Add eggs, butter, and sour cream, and process for 1-2 minutes. Add fresh lemon and orange juices, and pulse a few times until mixed.
Slide oven rack out and fill tart shell(s). Push rack back into oven carefully and bake until center of tarts is gently set, but not firm (should still have some wiggle to it), about 10-12 minutes. Remove from oven and cool on wire racks.

Spiced Persimmon Flax Cake

ust Because It's Vegan: Spiced Persimmon Flax Cake

Wow - I just realized it's been awhile since a "Just Because It's Vegan" post. Although most of my dishes are either vegan-friendly or can be with some simple modifications, I like to make sure I'm posting recipes that highlight just how tasty vegan eatin' can be.

So this recipe is one of many firsts for me. One, first time I've ever used persimmons in anything. I was at our local Asian market and saw the most gorgeous persimmons and immediately grabbed a few to bring home, having no idea what their fate would be. Secondly, I've never used this particular bundt pan, as I'm not really a baker. (those astute readers will probably realize that by checking out the recipe archives at the side) Baking intimidates me as the science is more exact and I don't feel the liberty to just add and throw things in as it suits, as I can do with cooking.

That being said, I just decided to use this recipe as a guideline, made my own modifications, and crossed my fingers, hoping that it would actually work. And did it ever! The cake is moist, tasty, and the perfect showcase for the fantastically sweet persimmons. Not only is the cake super easy to throw together, but you can easily substitute apples or pears if you can't find the persimmons. No matter how you slice it, I think this is a tasty cake that will be making a few appearances this season.

Spiced Persimmon Flax Cake

Spiced Persimmon Flax Cake

2 cups chopped persimmon
1 1/2 cup flour
1/4 cup golden flax seed
1 3/4 tsp baking soda
1/2 tsp salt
1 tsp cinnamon
1/2 tsp nutmeg
1/2 tsp ground ginger
1/2 cup water
1/4 cup fresh lemon juice
1/2 cup agave nectar
1 tablespoon cider vinegar
1 tsp vanilla
1/4 cup soy yogurt

Preheat oven to 350 degrees. Spray a bundt pan with cooking oil and set aside. In a large bowl, combine flour, flax seed, baking soda, salt, cinnamon, nutmeg, and ginger. In a smaller bowl, whisk together water, lemon juice, agave, vinegar, and vanilla. Add to dry mixture, along with yogurt, and stir well to combine. Fold in persimmon until well mixed. Pour into pan and place into oven.
Bake for 30 minutes, or until a toothpick inserted comes out clean. Remove from oven, allow to cool in pan for 10-15 minutes, and then completely cool after removing pan.

Apple Crisp with Gingersnap and Black Pepper Streusel

Oh, the days of spring. The weather is warmer and the days are getting longer and I think I'm in love with it. And yet, it's cold and rainy days like today that make me think of filling, warm, and delicious comfort food.

Although fall is traditionally the season for apples, I was able to get my hands on some super tasty ones at my local Wegmans. I haven't made an apple crisp in years, but for some reason, that's all I wanted. But not just any apple crisp - it needed some sort of flair. So I kicked it up with some gingersnaps and at the last minute, threw in some freshly cracked black pepper for some extra punch, which was fantastic.
This recipe is super easy to make and incredibly delicious!

Apple Crisp with Black Pepper and Gingersnap Streusel

Apple Crisp with Black Pepper Gingersnap Streusel

Streusel
1 cup gingersnap cookie crumbs
½ cup flour
¾ cup quick-cooking oats
1/3 cup brown sugar
½ tsp cinnamon
¼ tsp nutmeg
1 tsp coarsely ground black pepper
½ cup butter

Crisp
5 cups apples, peeled and chopped
2 tbsp lemon juice
¼ cup brown sugar
½ tsp cinnamon
¼ tsp nutmeg

Preheat oven to 375. Combine cookie crumbs, flour, oats, brown sugar, cinnamon, nutmeg, and pepper in a medium-sized mixing bowl. Cut in butter, using a pastry blender until mixture resembles coarse crumbs. Set aside.
In another bowl, toss apples with lemon juice, sugar, cinnamon, and nutmeg. Place into well-oiled baking dish, and top with streusel. Place in preheated oven and bake for 30 minutes, until apples are bubbly and top is golden brown.

Freezer Friday - Jalapeno Poppers

Out of all of the things in my freezer right now, these are definitely my favorite. Let's be honest for a minute, shall we?? I mean, we try and eat healthy and watch our fat grams and carbs and eat the good kinds of fat. But sometimes, all you want is something tasty, something cheesy, something fried.

These poppers fit the bill. Not only will they make good use of the bounty of peppers that should be springing out of the gardens, but they also freeze extremely well, which means you can always have these on hand to throw in the oven for guests or when you're just craving something tasty.

These are relatively easy to make, although slightly time consuming. (My batch took about 2 hours all together from start to finish). However, they last quite a while in the freezer if properly bagged. The recipe can also be easily halved.

Feel free to incorporate other ingredients into this recipe, such as crab meat or bacon. Switch the cheeses up and throw in some monterey jack, blue cheese, or queso fresco. You won't be disappointed if you give these a try!

Jalapeno Poppers


Jalapeno Poppers
Makes 48

2 (8oz) pkgs cream cheese, room temperature
1 (8oz) bag shredded sharp cheddar
1 tsp dried minced garlic
1/2 tsp cumin
1/2 tsp salt
1/2 tsp onion powder
1/2 tsp crushed red pepper (optional)
24 jalapeno peppers
2 cups milk
2 cups flour
2 cups seasoned breadcrumbs

In medium sized bowl, combine cheeses and seasonings until well mixed. Set aside. Bring a medium sized pot of water to boil. In the meantime, remove stem from jalapeno peppers and cut into half. Take out seeds and set aside. Repeat with remaining peppers. Blanch peppers for 2 minutes in boiling water. Drain and rinse with cold water. Allow to dry for a few minutes.
Fill all pepper halves with cheese mixture. Then dip each half into milk, then coat with flour, setting aside on baking tray. Repeat with remaining halves. Allow to dry about 10 minutes. Then dip each half into milk, and then coat completely with breadcrumbs, setting aside on baking tray. Repeat with remaining halves. Allow to dry about 10 minutes. Then repeat breadcrumb coating step.
Meanwhile, bring oil to frying temperature in large pot. Fry peppers in batches, about 2-3 minutes, until golden brown. Drain on paper towel lined tray. Cool and serve.
To freeze, allow to cool, then place in freezer on baking tray. Once frozen, pack in portions in freezer bags, then place into a larger freezer bag. To reheat, place frozen poppers on baking tray in 375 degree oven for 15-20 minutes, until heated through.

Garlic Parmesan Edamame

So the other night I was at Checker's (yes, again) with some old friends of mine. Someone ordered the Garlic Parmesan Wings. Now I obviously am not a chicken eater, but the sauce smelled so good that I immediately wanted to try and use it with something.

I kicked around a few ideas in my head and had a list of things to try. Yet it wasn't until I picked up some edamame (which I always try to keep on hand in my freezer for a quick delicious snack) that it hit me - it would be perfect together.

Seriously - WOW! No, really. This is absolutely fantastic. It literally takes about 15 minutes to make and is amazingly tasty. I think this may have just become my absolute favorite way to eat it.

Go ahead - give it a try!

Garlic Parmesan Edamame

Garlic Parmesan Edamame
Serves 4

1 (16 oz) pkg frozen edamame in shell
1/2 c extra-virgin olive oil
4 cloves garlic, minced
1/2 c Italian-seasoned bread crumbs
1/2 c freshly grated Parmesan cheese
salt to taste

Steam edamame in microwave until slightly warm and not frozen. (You can do this one of 2 ways - I have a microwave steamer that I use, or even easier is throwing the edamame in a ziploc bag with about a tbsp of water, sealing it, leaving a small opening for steam, and heating it on high for 2 minutes) Drain and set aside.

In a small food processor, combine olive oil and garlic. Process until well-combined. Heat a wok over medium high heat. Add edamame and toss for a few seconds. Add garlic oil and saute for a minute or two, stirring constantly. Add breadcrumbs, Parmesan, and salt and toss until well coated. Serve immediately.

Stuffed Artichokes

Part of what I really love about cooking is the constant desire to know more about it. There's nothing I love more than reading through cookbooks and jotting down recipe ideas and flavor combinations. I guess that makes me a food dork, but I don't care.

One of my favorite things to do is to randomly pick out something at the grocery store that I either have no idea what it is or have never prepared it before in my life. And that's where these artichokes came in. Although I've had them a few times, I've never actually prepared them. And not only have I never prepared them, but I actually had no idea what to do with them. But that didn't scare me. I immediately threw 2 in my bag and vowed to hit up both Google and my go-to cookbook when I got home. (Seriously, if you do not have either Mark Bittman's "How to Cook Everything" or "How to Cook Everything Vegetarian," then you must get thee straight to your bookstore).

Anyway, I came home, threw these on the counter and stared at them for a bit before I tackled them. First off, watch this video. It will absolutely give you the tools you need to prepare them. Secondly, I caution you - artichokes are dangerous little things and have sharp little spiky points, so use caution when preparing them. And finally, I won't lie when I say these are sort of a high-maintenance vegetable to prepare. You peel, core, and prepare them, and then it's 25 minutes in the steamer, followed by 20 minutes in a hot oven. The good part, though, is that most of this time is non-active time, so it's not like you're slaving over a hot stove endlessly.

For the stuffing, I used panko, but only because I love the light flaky texture of it. You can easily substitute regular bread crumbs. I also used fresh thyme, but only because I had it on hand. Feel free to use whatever fresh herb floats your boat. I also used a truffle olive oil, but only because I could.

No matter how you make these, I can guarantee they will be surprisingly delicious and well worth the prep time.

Food 007

Stuffed Artichokes
Serves 2

2 large artichokes
1/2 c Italian Seasoned panko crumbs
1/4 c freshly shaved Parmesan cheese
3 tbsp fresh thyme, or 1 tsp dried thyme
1 tbsp olive oil

Destem, de-choke, and remove the tough outer leaves from the artichokes. (the video is very helpful for this). Bring a steamer with water to a boil. Add artichokes, bottoms up, to steamer and steam for 20 minutes. While they are steaming, combine remaining ingredients in bowl. Remove artichokes from steamer and place bottom down in a baking dish. Preheat oven to 375. Drizzle artichokes with a small amount of olive oil. Place spoonfulls of stuffing mix in center, as well as packed in between the leaves. Place into oven and bake for 20 minutes. Serve and enjoy.

Wild Mushroom and Goat Cheese Puff Pastry Braid

So finals are finally done and thankfully, I'm back in the kitchen. Thanks for all of the birthday wishes last week. And now, the holiday crunch is on. I haven't started any of my Christmas shopping, so I really need to get on the ball.

But with the holiday crunch time comes plenty of holiday parties, which I think is the best part. And when having a party, there is nothing better than having some delicious foods to serve your guests. I think you can file this recipe under "Ace in the Hole" category, as it's super simple to make and throw in the oven, and with the exception of the mushrooms, you can have most ingredients on hand in your kitchen at all times.

The puff pastry did take 40 minutes to thaw, which is perfect time for doing the rest of the prep. The mushroom mixture is really just my 5-Minute Mushroom Sauce, so you know that part is easy. By the time the pastry is ready, the rest of the ingredients are assembled and ready to go. This could also be made in puff pastry shells, adding a small amount of goat cheese and mushroom to each cup. Talk about an elegant finger food!

I think you'll really like this one....

Wild Mushroom and Goat Cheese Puff Pastry Braid

Wild Mushroom and Goat Cheese Puff Pastry Braid
Serves 6-8, appetizer size

2 tbsp olive oil
1 clove garlic, minced
2 cups mushrooms, chopped (I used a combination of crimini, shiitake, and oyster)
a pinch of salt
1 tsp butter
1 tsp fresh thyme leaves
1 tsp balsamic vinegar

1/2 pkg puff pastry sheets
1 (3.5 oz) pkg goat cheese, sliced

Allow puff pastry to thaw at room temperature for 40 minutes. In the meantime, heat olive oil in a medium saucepan. Add garlic and saute for 30 seconds. Add mushrooms and salt, cover, and cook for 3-4 minutes, stirring frequently. Add butter, thyme, and balsamic vinegar, and cook for an additional minute or two. Remove from heat.
Preheat oven to 400. Unroll thawed pastry sheet and lightly roll to get rid of creases. On each side, cut 1" slits into the first crease mark. (Here's an excellent quick video to watch that explains it much better than I ever could.) On center of pastry, layer goat cheese slices down center. Spoon mushroom mixture on top of cheese, then braid pastry over filling. Place into preheated oven and bake for 20-25 minutes, until puffy and golden brown. Serve and enjoy!

Morning Bran Muffins

I'm back, and I've finally learned to love again after the loss of my dear refrigerator. You never really realize just how much you keep in there until it's gone and you go to reach for it.

As my faithful readers know, I'm a huge fan of quick breakfast foods - something that can be grabbed and thrown in a bag to eat on the way to work. These muffins are perfect for that.

Not only are these muffins quick and easy to grab, but they are also loaded with heart and body-healthy ingredients. They've got wheat bran, flax seed meal, wheat flour, are relatively low in oil and sweeteners, and the addition of the coffee helps keep them super moist.

Morning Glory Muffins

Morning Bran Muffins

1 c cold coffee
1/3 c molasses
2 eggs (or egg substitute)
1 c soymilk
1/2 c light olive oil
1/2 c applesauce
1 tsp vanilla
2 c wheat bran
1 c white flour
1/2 c wheat flour
1/2 c flax seed meal
1/2 c light brown sugar
1 tsp salt
1 tsp baking powder
1 1/4 tsp baking soda
1/2 tsp cinnamon
1/4 tsp nutmeg
1 c raisins or dried cranberries

Preheat oven to 350. (While combining ingredients, I soak the raisins or cranberries in 1 c hot water to plump them up. Drain, and add at end of recipe) Combine coffee, molasses, eggs, soymilk, oil, applesauce, and vanilla in a large bowl. Set aside. In another bowl, combine bran, flours, flax seed meal, sugar, salt, baking powder, baking soda, and spices. Stir into wet ingredients. Stir in soaked raisins or cranberries. Fill greased muffin cups 2/3 full, or fill 3 greased mini loaf pans 2/3 full. Place into preheated oven and bake, 20-25 minutes for muffins, and 30-35 minutes for mini loaves. Bake until toothpick inserted comes out clean. Remove from oven, remove from pans, and cool on wire racks.

Chai Pumpkin Bread

There's nothing more comforting than richly-spiced bread, warm from the oven, and spread with melting butter. This is a perfect wintertime bread, and if you love chai tea, you'll love this.

Perfect for those afternoon cups of coffee or tea, or great to make in mini loaves and give as gifts.

Chai Spiced Pumpkin Bread

Chai Pumpkin Bread
1/2 c sugar
1/2 c butter, at room temperature
1 c canned pumpkin
2 large eggs
2 chai tea bags, steeped in 1/2 c boiling water
1 tsp vanilla
1 1/3 c all-purpose flour
2/3 c whole-wheet flour
2 tsp baking powder
1/2 tsp baking soda
1 1/2 tsp salt
2 tsp cinnamon
1/2 tsp each cardamom, ginger, and black pepper
1/4 tsp each cloves, nutmeg, and allspice

Preheat oven to 350. In a large bowl, use a mixer to beat together sugar and butter until light and fluffy. Add pumpkin, eggs, chai tea liquid, and vanilla and stir until well combined. Add flour, baking powder, baking soda, salt, and spices and stir just until evenly moistened. Pour into prepared 8" loaf pan. Bake 45-55 minutes, or until a toothpick inserted comes out clean. Cool at least 20 minutes before serving.

Lemon & Green Tea Granola

I've been craving homemade granola for a bit now, and I finally took the time to make it this week. There's something so satisfying about freshly made granola, and it's so cheap and easy, you'd be crazy to not make your own.

I've been mildly obsessed with using more tea in my cooking (see the Tea Glazed nuts) and I wanted to try it in granola. It came out quite tasty, and I think you'll enjoy this. It's perfect with soymilk (or cow's milk if you prefer) or sprinkle it in your favorite yogurt.

I also think this recipe could be used with a hundred different variations - use different tea or different combinations of grains. No matter what you use, I'm sure you'll love this homemade granola.

Lemon  & Green Tea Granola II

Lemon and Green Tea Granola
3 1/2 cups Bob's 7-Grain Rolled Oats Mix
1/4 c flax seed
1/4 c wheat bran
zest of 1 large lemon (about 1 tbsp)
juice of 1 large lemon (about 2 tbsp)
Tea from 2 green tea bags cut open
1/2 c honey
3 tbsp melted butter

Preheat oven to 350 degrees. Lightly oil a baking sheet with sides or a large roasting dish. In large bowl, combine all ingredients and stir well. Spread out in baking dish and place in oven. Bake for 15 minutes, stirring as little as possible, yet keeping it from burning, until nicely toasted. Do not overbake, as the more you bake, the less lemon flavor there will be. Cool. Enjoy with milk, stirred into yogurt, or however you enjoy your granola.

Super Bars

With my busy schedule, even though I try and eat breakfast every morning, there's some mornings that just doesn't happen. If I can't grab it and eat it on the go, then I usually just go without eating. Anytime I can find a quick-to-make, easy-to-grab healthy recipe for a breakfast treat, I'm all about it.*

These awesome granola bars were posted over at Domestic Affair, which is a great blog if you're looking for a wealth of info and recipes on whole foods and holistic nutrition. As soon as I saw this recipe, I immediately began making a list of what I needed from the grocery store. I've changed the recipe a bit, replacing the oil with applesauce and I added some silken tofu for protein.

I was really amazed at how this "very healthy for you" recipe was so tasty. It's perfect for breakfast, or anytime you're looking for a not-too-sweet snack. I also love that it's loaded with whole grains. The recipe is also flexible enough that you can use whatever grains/fruits/seasonings you want, depending on your mood. A bonus - these freeze well, so you can always have them on hand.

Super Bars

Super Bars
3 cups Bob's 7-grain Rolled Oat Mix
1 cup water
1/4 c flax seeds, partially ground (coffee grinder works great)
2 tbsp amaranth
1/2 c oat bran
1/2 whole wheat flour
3/4 c dried fruit (I used a tropical mix with mango, apricot, etc.)
1 tsp cinnamon
1/2 tsp nutmeg
1/4 tsp sea salt
2/3 c pure maple syrup
1/2 c apple sauce (I used an organic apple apricot sauce)
5 oz silken tofu
zest of 2 lemons

Preheat oven to 350. Spread the oats out on a baking sheet, and toast in the oven, stirring occasionally until toasted, about 20 minutes. At the same time, heat water, flax seeds, and amaranth. Bring to a boil, lower heat, and simmer for 8 minutes. Remove from heat.
In a large bowl, combine oats and all dry ingredients. In a food processor, process apple sauce and tofu until combined. Add to dry ingredients, along with maple syrup and lemon zest.
Spread in a lightly oiled square baking pan and score into bars. Place into 325 degree oven, and bake 30 minutes until firm to the touch. Cool and then slice. To freeze, individually wrap in foil. Toss into a 350 degree oven for 5-10 minutes to thaw and enjoy.

Vegetable Quiche To Go

I often struggle with eating breakfast in the morning. It's not that I don't have the time, it's just that I usually forget or don't put the effort into it. Then of course I'm starving by 9:30 and scrounging through the office looking for something to eat.

I discovered these in a South Beach Diet cookbook, but they really are quite fantastic for anyone's breakfast. One batch makes enough for almost a week's worth of meals, and they store well in the fridge. They're exceptionally easy to make and only take about 35 minutes from start to finish. They also freeze well, so you can easily have these on hand to pop into the microwave on those busy mornings. I used mushrooms, onion, and spinach, but you could easily substitute whatever veggies you have on hand - green peppers, tomatoes, asparagus, etc. Here are some tasty variations:

Feeling Greek? Throw in spinach, feta, and mushrooms.
Feeling Mexican? Try adding some salsa, green peppers, and some mexican spices.
Feeling Fancy? Try smoked salmon, chopped red onion, and capers.

The possibilites are virtually endless. So go ahead and give this quick breakfast a try!


Vegetable Quiche To Go

Vegetable Quiche To Go
Makes 6 servings

2 tbsp olive oil
3/4 c chopped onion
1 c chopped mushrooms
1 c chopped fresh spinach leaves
1 c shredded cheese
2 cups Egg Beaters (or equivalent in real eggs)
1/2 tsp garlic powder
1/2 to 1 tsp of your favorite seasoning salt
1/4 tsp crushed red pepper flakes (optional)
Pepper to taste

Preheat oven to 350. In saucepan, heat oil over medium high heat. Add onion and mushroom, and saute until tender, about 3 minutes. Add spinach and stir until wilted. Remove from heat. Place foil muffin liners in a 12-cup muffin pan. Place 1 tbsp of vegetable mixture in each cup. Top with a pinch of cheese. In a large bowl, whisk egg beaters with seasonings and evenly divide into muffin cups. Place into oven and bake for 20 minutes, or until a knife inserted comes out clean. Cool and remove liners. Store in refrigerator or freezer.